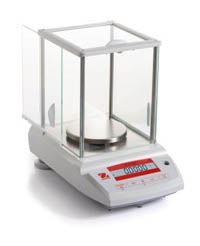
Abstract: Electronic precision balances usually use electromagnetic force sensors to form a closed-loop automatic adjustment system with high accuracy and stability. It is a comprehensive product of the development of sensing technology, analog electronics technology, digital electronics technology and microprocessor technology. It has many functions such as automatic calibration, automatic display, and overload protection. The following small series will simply introduce to you the electronic precision balance sensitivity adjustment method.
1. The balance should be adjusted to the level and open the program switch of the balance.
2. Open the balance and make the balance display a stable zero.
3. Hold down the TARE key and hold it. The balance shows “BUSYCAL and value (correction weight value)â€.
4. Place an adjustment weight equal to the value displayed at the third point on the balance pan. This calibration weight should be less than 2% error, if there is over tolerance there will be "positive sign" or "negative sign" displayed on the display. The "positive sign" means that you want to increase the mass value; otherwise "negative sign" to reduce the mass value, the balance shows "BUSYCAL" and the correction weight value.
5. The “g†symbol appears on the balance display and is accompanied by an acoustic signal.
6, remove the correction weight, balance display zero later.
7. Close the balance and the display shows "STANDBY".
8. Press the "CAL" key with one hand, press the switch key with the other hand, and display the balance to "CH4".
9. Press the peel key again and the balance displays “CH4CALâ€.
10. Release the “CAL†key and the balance displays “BUSYGAL†and “0.0000gâ€.
11. The balance shows "0.0000gCAL"
12, press the "CAL" button once, the balance shows "BUSYCALC".
13. The "BUSYCALCC" will be displayed later.
14. Wait for the balance to display zero.
15. If the balance has a newly installed parameter "EEPROM" memory, repeat steps 12 to 14 again.
16. Call up the balance program page number 4, and the display will show “41A or 42â€.
17. When the program code 42 appears on the display, press the balance peel key to make the balance setting program “42â–²â€.
18. When the last digit of the program code is zero, press the TARE key to return the balance to the zero position of the weighing program.
19. Return the balance program switch to the locked position.